
Viewport
The viewport is the central area where you see and edit the scene in 3D. It hosts a Scene tab for editing and a Game tab that runs the game. In the Scene tab, selecting a node syncs with the Outliner and the Inspector, and a toolbar along the top controls the transform gizmo, snapping, the grid, and the camera.
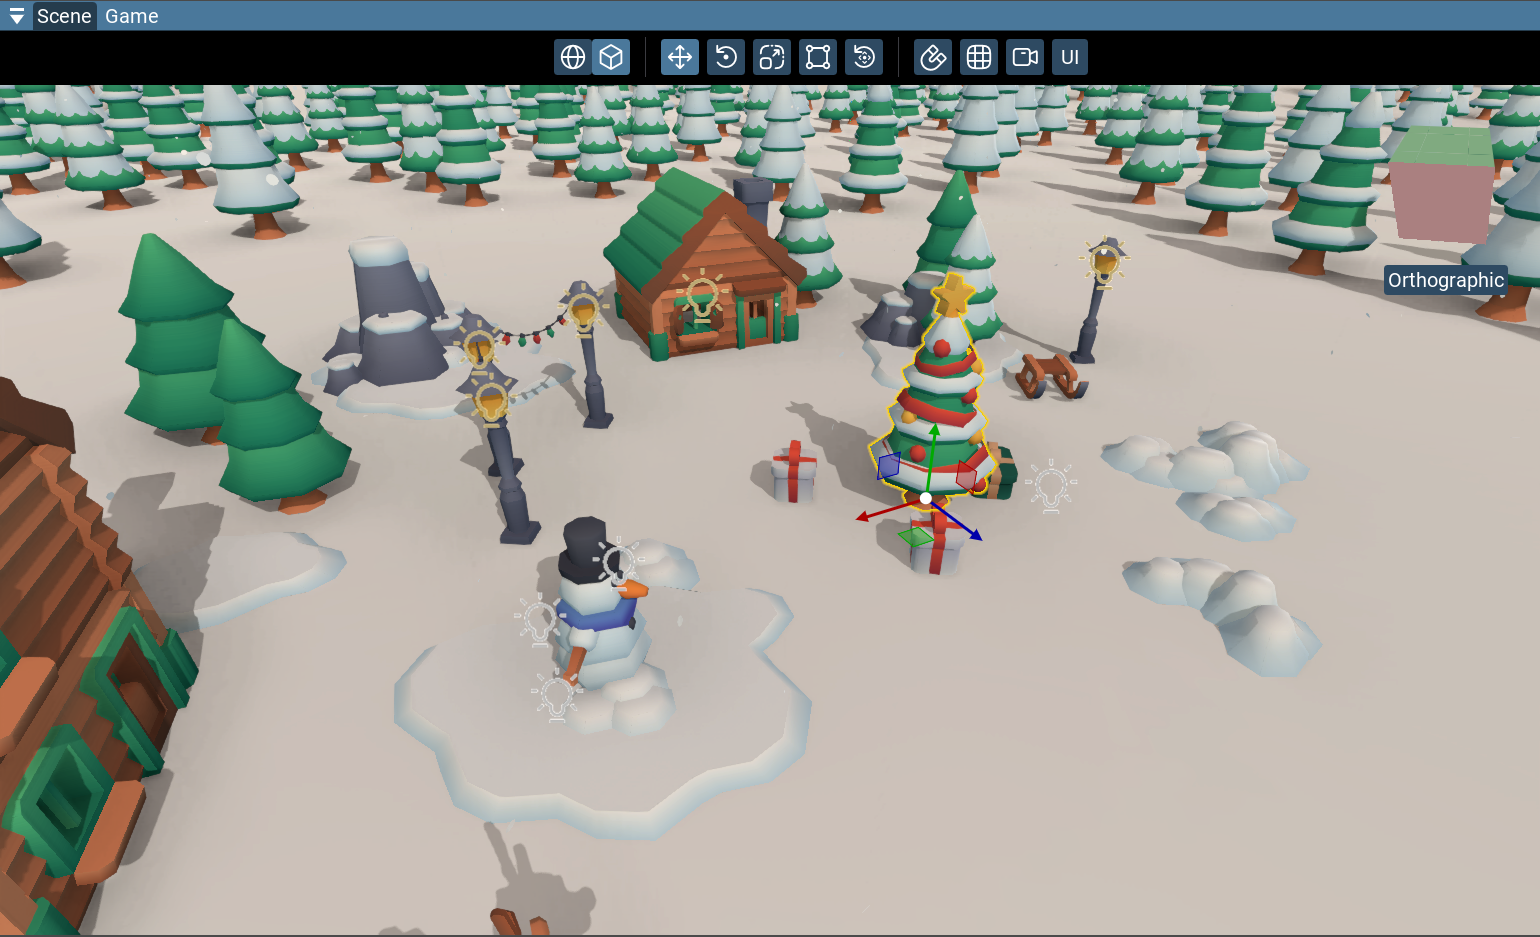
Scene and Game tabs
The central dock holds two tabs, switchable with Ctrl+1 and Ctrl+2:
Scene — the editing view described on this page: a free-flying editor camera, selection, and the transform gizmo.
Game — the running game as the player sees it, drawn with the game’s own camera and with no editor gizmos. While this tab is focused the game receives input and the mouse cursor is captured; press
Escapeto open the User Menu.
Selecting objects
Left-click an object to select it (the click is raycast into the scene).
Ctrl + left-click toggles a node in or out of the selection.
F focuses the camera on the current selection.
You can also drag a material from the Project panel onto an object to assign it, or drag a prefab or model in to instantiate it — see Drag and Drop.
Toolbar
World / Local — the gizmo’s orientation mode (hotkey X).
Gizmo operation — Translate (W), Rotate (E), Scale (R), Bounds (T), or Transform (Y, the universal gizmo).
Snap settings — a popup with Translation, Rotation, and Scale snap amounts. Hold Ctrl while dragging the gizmo to snap to them.
Grid settings — a popup with a Show grid toggle and the grid plane (X / Y / Z).
Camera settings — opens the camera popup (see Camera settings).
UI — switch to a 2D (orthographic) mode for editing UI.
Gizmo and view cube
The transform gizmo appears on the selected node; drag its axes to move, rotate, or scale it according to the current operation and World/Local mode. Hold Ctrl to snap.
With the Bounds operation (T), drag a corner or edge handle of the box to resize the node – this is how you resize UI elements. Hold Shift while dragging a corner to resize proportionally, keeping the original aspect ratio.
The view cube in the top-right corner rotates the camera when you drag it.
Below the cube, a Perspective / Orthographic label toggles the camera’s projection.
Camera settings
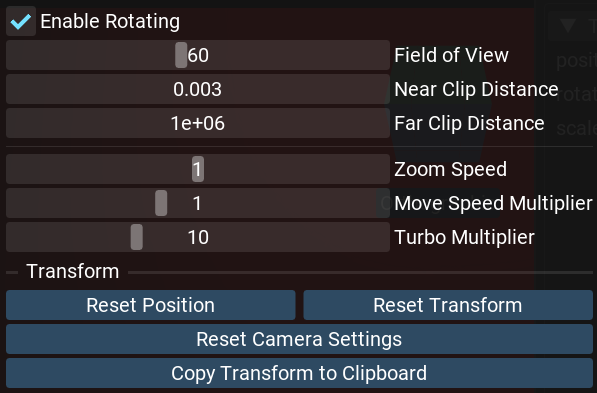
The Camera button in the toolbar opens the camera popup:
Enable Rotating — allow look-around with the right mouse button.
Field of View (in degrees), Near Clip Distance, Far Clip Distance.
Zoom Speed, Move Speed Multiplier, Turbo Multiplier.
Reset Position, Reset Transform, Reset Camera Settings.
Copy Transform to Clipboard — copy the camera’s transform.
Prefab viewport
Opening a prefab for editing — by double-clicking it in the Project panel, or with Open prefab source from the Outliner or Inspector — replaces the scene in the viewport with that prefab on its own. The gizmo and camera controls are the same.
A Back to scene button (top-left) returns to the normal scene view.
A Save button (top-right, Ctrl+S) saves the prefab; the tab shows a dot while there are unsaved changes.
If the prefab file changes on disk or is removed while you are editing it, a modal asks how to proceed.
Changing which node is the prefab’s root (Make prefab root), turning an instance back into plain nodes (Unpack prefab), and saving a sub-tree as a new prefab are done from the Outliner context menu. For the full prefab-editing workflow see the Prefab Editor; for prefab inheritance and per-instance overrides, see Prefabs.